Visit date: February 13
Founder Danny Gabriner's love of bread and bagels caused him to leave his day job over a year ago to start Sour Flour. Sunday's are dedicated to preparing bagel dough while Mondays are dedicated to boiling and baking the bagels at La Victoria Bakery (a kind of communal kitchen featuring pop-up bakeries on a pretty regular basis), then giving the bagels away for free!
As part of a wild yeast series at 18 Reasons, Danny held a class today about making bagels. We start with flour in front of us, add salt, starter, water, and finally form our bagel rounds to take home. We work in groups of three during the initial kneading process while Danny talks about hydration, temperature, starters, etc. The end result is to divide our dough into three chunks, one for each person in the group, then further divide the dough into 125g bagel rounds, about four per person.
Stage 1 – Create a well with the flour. Add salt, starter (water, yeast, bacteria), water.
Our ingredients are pre-measured for us before class and designed to have 53% hydration, meaning 100g of flour with 53g water. In bread terms, 53% hydration makes a pretty stiff dough, resulting in slower fermentation. We also use less starter because our bagels will have time to sit overnight before boiling and baking. "100% is fairly hydrated, but moving up to 150% will cause enzymes to break down the starch in the flour even faster, providing the simple sugars for the yeast and bacteria to eat. Any hydration will work, and depending on where you choose to fall in the spectrum, your starter will favor the production of different flavors."
 |
| salt and starter added |
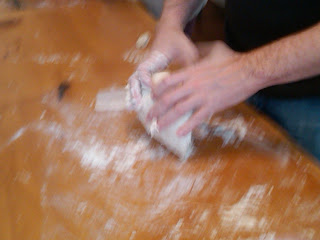
Stage 2 – Combine ingredients starting with the flour closest to the center so none of the water is lost. Pushing the wall away increases surface area and gradually lowers the flour wall. Once all the water is absorbed, knead the dough, working it as much as possible. It is better to overwork than underwork.
This is probably the hardest part of the class. Not only is our dough stiff to begin with at 53% hydration, the time constraint of the class means the dough doesn't get to rest and relax as long as it normally would. Luckily, we work in group of three and take turns.
Stage 3 – Form the dough into a ball and let rest five minutes. It should start to look smooth, but still have some ridges. The main thing is to knead the dough to rid of flour patches.
Stage 4 – Stretch the dough as thin as possible. Fold and form into a ball. Knead aggressively – fold in half, knead, quarter turn, fold in half, knead, quarter turn, etc.
Stage 5 – Let the dough rest ten minutes and repeat stage 4.
Some of our doughs have air pockets which is totally ok. Notice the difference in the texture of the dough after more kneading.
 |
| This is someone else's dough. Her dough is really smooth and soft, even starting to get some shine! She had a smaller portion to work with, making kneading easier. |
Stage 6 – Divide the dough into three portions, one for each person in the group. Further divide the dough into 125g portions.
Stage 7 – Pre-shape the dough: 1.) stretch out the 125g portions, 2.) roll dough like a fruit roll-up
Stage 8 – Form into bagels: 1.) roll each portion to extend length-wise, long enough to wrap around your hand, 2.) wrap loosely around your hand to form the round bagel, 3.) roll/pinch the 2 ends together to close the bagel round
At this point, the class is over and we can take our bagels home to boil and bake.
Stage 9 – Put bagels into the fridge, covered with a damp cloth so they don't dry out and form a skin. Prior to sleeping, remove bagels from fridge, leave out overnight, still covered. The cloth may need to be re-dampened.
Stage 10 – In the morning, pre-heat oven to 500 degrees. Meanwhile, boil a pot of water, using a wider pot for more surface area rather than a taller pot. Depending on the size of the pot, boil 2-3 bagels at a time. Each bagel will sink immediately before floating. Once floating, boil bagels for about two minutes per side.
Note: The time it takes for bagels to float depends on the amount of starter/yeast used, which is activated by the boiling water. Less starter means longer period of time before bagel floats, up to a minute or more. This also equates to a longer boiling time once bagels are floating.
Stage 11 – Drain bagels on cooling rack to remove excess water.
Stage 12 – Place boiled bagels on cookie sheet with cornmeal, which prevents bagels from sticking to the sheet. Other alternatives are pizza stone and parchment paper. If using pizza stone, pre-heat oven for a longer period of time because the stone absorbs heat.
Stage 13 – Bake bagels in oven at 500 degrees for about twenty minutes. The hot temperature is what gives bagels that crispy outside and soft chewy inside.
Stage 14 – Time to eat!


No comments:
Post a Comment